Installing Wainscoting: A Classic Touch for Modern Interiors
Wainscoting has long been a staple in home design, bridging the gap between timeless elegance and contemporary flair. If you’re looking to infuse some character and durability into your modern interior, wainscoting might just be the perfect addition. In this guide, we’ll take you step-by-step through the process of installing wainscoting, while adding some humor and insight along the way.
Why Choose Wainscoting?
First things first, why even consider wainscoting? Aside from its aesthetic appeal, wainscoting protects walls, adds architectural interest, and can even increase your home’s value. It’s like the Swiss Army knife of interior design elements!
- Durability: Protects your walls from dents and scuffs.
- Elegance: Adds a touch of sophistication to any room.
- Versatility: Complements a variety of interior styles.
Still need some inspiration? Check out these Top Interior Telegram Channels for the latest trends and ideas.
Gathering Your Materials
Before you dive into the world of wainscoting, you’ll need to gather some essential supplies. No magic wands required—just some good old-fashioned tools and materials!
- Wainscoting panels or boards
- Measuring tape and level
- Construction adhesive
- Nails and a nail gun (or hammer)
- Caulk and caulk gun
- Paint and paintbrushes (optional but recommended for a polished look)
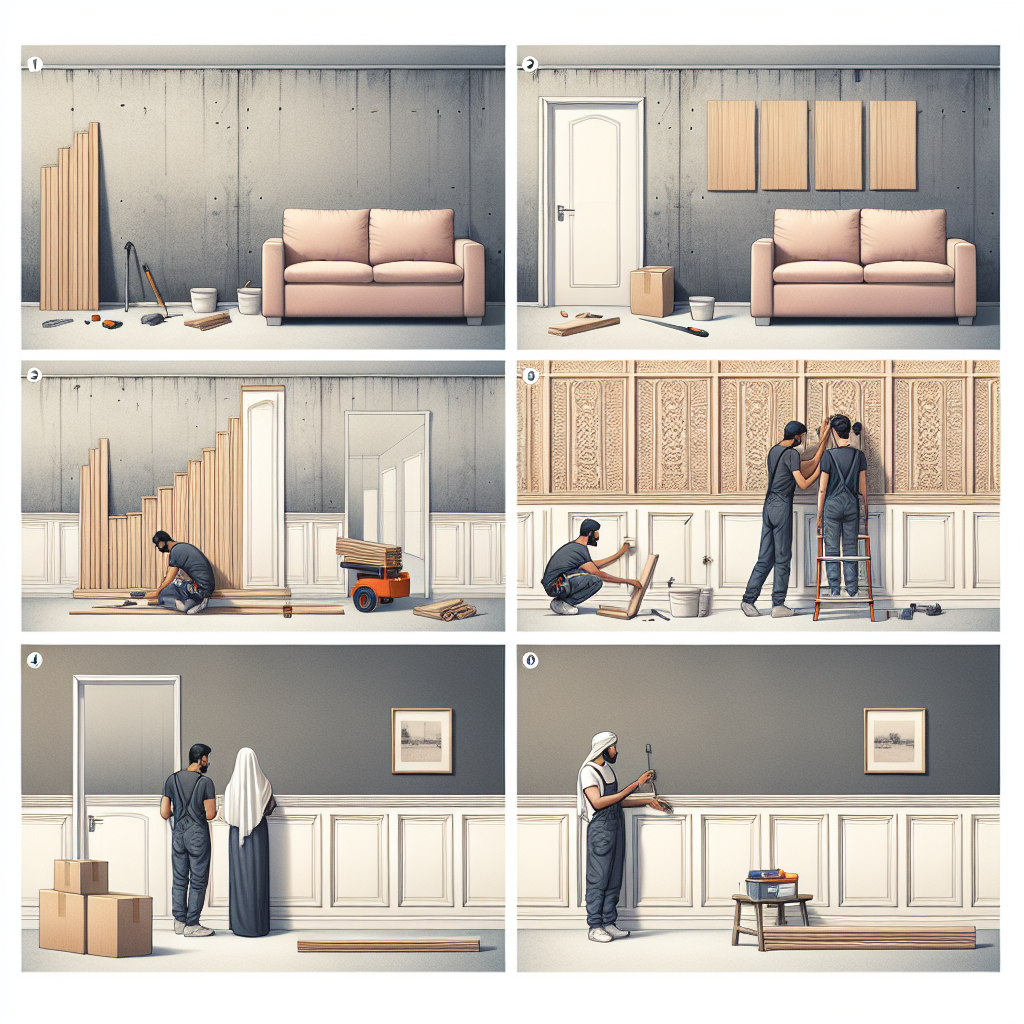
Step-by-Step Installation Guide
1. Measure and Plan
Measure the height of where you want your wainscoting to start and mark it with a pencil. Typically, wainscoting ranges from 32 to 42 inches in height. Use a level to ensure your lines are straight—a crooked wainscoting job is worse than no wainscoting at all.
2. Cut and Attach Panels
Cut your wainscoting panels or boards to the appropriate sizes. Attach them to the wall using construction adhesive and follow up with nails for extra security. Remember, folks: safety first. Don’t do anything that would make your insurance agent facepalm.
3. Fill Gaps and Caulk
Once your panels are attached, fill in any nail holes and gaps with wood filler. After it dries, sand the filled areas until smooth. Then, use caulk to seal the edges between the wall and the wainscoting panels. This gives the installation a seamless, professional-looking finish.
4. Paint and Finish
Finally, paint the wainscoting to match or complement your existing wall colors. You’d be surprised how a coat of paint can transform simple wooden panels into a statement piece. Pro tip: If you’re not a fan of painting, enlist the help of a friend. Preferably one who owes you a favor!
The Joy of Wainscoting
Congratulations, you’ve installed wainscoting! Take a step back and admire your handiwork. Not only have you added a classic touch to your modern home, but you’ve also mastered a new skill. Who knew DIY could be this rewarding?
If you’re itching for more creative home improvement ideas, explore the Best Interior Telegram Channels. From minimalist designs to eclectic inspirations, there’s something for everyone!
Conclusion: A Timeless Touch
Wainscoting effortlessly bridges the gap between old-world charm and modern sophistication. Whether you’re revamping a single room or renovating an entire home, this classic touch can elevate your interior design game. So grab your tools, follow these steps, and transform your living space into a stylish haven.
Ready to continue your journey in interior design? Stay updated with the Latest Interior Telegram Channels for ongoing tips and trends. Happy decorating!